Sunday, May 24, 2015

Bulgarian Garash Cake


Bulgarian Garash cake is perhaps one of the most popular deserts in Bulgaria.  I grew up loving it.  It is served in most cafe's and pastry shops in Bulgaria.  Even though this cake is so popular, the authentic recipe is either lost or impossible to find. (If you happen to have it,  please contact me!!)  I tried making a few versions and I modified it to what I think is the closest to the original Garash cake, or at least what I remember growing up with.  The main ingredients are walnuts, chocolate, eggs, butter and cream, either way you can't go wrong with this chocolaty - nutty goodness!!! 


Ingredients:


Cake Layers: 

10 - egg whites, room temperature (make sure there is ONLY egg whites)

1 1/2 cup - sugar 

3 cups - walnuts, processed + more for decoration 

1/2 cup - almond flour 

pinch of salt 

pinch of cream of tartar

1/2 teaspoon - cherry extract or rum 


Chocolate Filling:

6 - egg yolks

1/4 cup - heavy cream (40% milk fat)

1/2 cup - sugar 

1 cup - semi sweet chocolate chips 

2 sticks - butter, room temperature  

pinch of salt 

Ganache:

3 - eggs yolks 

1/4 cup - sugar 

1/2 cup - semi sweet chocolate chips 

1/4 cup - heavy cream (I used 40% milk fat heavy cream) 

dash of salt 


Directions:

This cake requires minimum of 8 hours refrigeration.  

    1. Start with the chocolate filling.  In a heatproof bowl set over (not in) a pot of simmering water, whisk together the egg yolks, sugar and salt until sugar is dissolved. Whisk in the chocolate chips until melted.  Slowly mix in the heavy cream and set aside to cool off until it reaches room temperature. In a food processor bled the butter and chocolate mixture together. Set aside. 

   2.   Cake layers. Preheat oven to 300 degrees F. Precut parchment paper to fit on the bottom of (spring form) cake pans. If you have just one pan, thats ok. Just reuse for every layer. 
In a mixer bowl, add the egg whites, salt and the cream of tartar. Beat on slow speed until egg whites form a thick foam. Add the sugar slowly while still mixing. Add the extract and keep mixing until stiff peaks form. After the merengue is ready, with a rubber spatula fold in the walnuts and almond flour until well mixed. (Don't over mix it though.)

3. Baking the layers. With a cooking spray (or melted butter) spray bottom of cake pan including sides. Put the parchment paper on the bottom of the pan and spray again. Divide merengue mixture into 4 layers (I usually eye it, so I don't loose any batter). Pour 1/4 of the batter and carefully distribute batter equally, avoiding touching the ends of the pan.(if it does, that's ok. It is just easier to take out of the pan.) Bake for 20 minutes. After the first layer is done, remove sides of pan and let it cool for a minute or two. Then gently flip over in a serving dish. (It is important that you do that while the layer is warm. Otherwise it is easily cracked. Pour some of the chocolate filling on to and spread gently with a brush or a rubber spatula. (if filling becomes too runny due to the heat of the layer, you may try keeping it in the fridge while the next layer is getting cooked). 
   Repeat this process with each layer baking each for 20 minutes. Save the top of the last layer for the ganache. 

3. Ganache. Repeat same steps as the chocolate feeling. The only thing you will not do is mixing the chocolate with butter. The ganache is ready after chocolate is melted and you mix in the heavy cream. Cool off a little then pour ganache over the top layer of the cake. With a rubber spatula or a brush spread equal amounts everywhere, including sides of cake. Decorate with walnuts and/or toasted coconut. Refrigerate overnight for at least 8 hours. Enjoy!


Saturday, May 23, 2015

Spanish Tortilla


Do not confuse spanish tortilla with mexican tortilla. They are completely different.  The origin comes from Spain.  Classic spanish tortilla is generally made from potatoes, eggs and onion.  I have always liked classic spanish tortilla although I have always thought I could make it a little more flavorful.  So I did.  In addition to the main ingredients I added, fresh parsley, dill, sweet peppers, olives and butter. The result…divine!  This dish is not only delicious but beautiful.  Look at all those colors.  A great way to impress your guests for breakfast, lunch or dinner. 

Ingredients: 

6 - medium eggs, beaten 

2-3 - medium size potatoes, diced

1/2 - yellow onion, minced 

7-8 - sweet mini peppers or 1/2 red bell pepper 

1/2 cup - fresh italian parsley, chopped, unpacked 

1 1/2 tablespoon - fresh dill, chopped

1/2 cup - sunflower oil (vegetable is ok)

3 tablespoons - unsalted butter

8 black olives, chopped 


Directions:

 Preheat a 12" non-stick frying pan at a medium - low heat. Combine the butter and oil. After the butter melts and is mixed well with the oil, add the onions. Cook for about a minute or two(to flavor the oil). Add the potatoes and peppers and cover. Cook for about 5 minutes and add the fresh parsley, dill, olives and salt. Mix everything and distribute the potato mixture equally in the pan. 


Cover and stir occasionally so the potatoes won't stick to the bottom of the pan. You will know the potatoes are ready when you can easily cut a potato in half with a fork. When the potatoes are ready , flatten the mixture with a spatula and increase heat to medium high. This is done to brown the bottom of the potatoes. Brown for a minute and then flip the potatoes over with a spatula little by little to get the other side brown. Take off the stove for a moment to cool off a little and turn down heat to medium low. Add the beaten eggs and distribute. Put back on the stove. (Decreasing the temperature will help the eggs not to cook too fast). With a rubber spatula keep pushing the ends in. Cook until ends are cooked and theres very little liquid in the middle. Place a flat 12" plate directly on top of the tortilla and flip the pan, placing the tortilla on the plate. Then slide the tortilla back into the pan and cook for another 3 minutes or until done. (Flipping the tortilla is the hardest thing to do, so be patient if you don't succeed the first time. You will get it). After the bottom of the tortilla is done slide into a serving dish and garnish with parsley. Enjoy! 


Saturday, May 16, 2015

Crème Brûlée Oats


This fancy oatmeal is simply scrumptious. Who am I kidding?!  This is like a desert!  It is basically an old fashioned oatmeal, caramelized sugar, topped with berries, almonds and a home made vanilla bean whipped cream.  Impress the guests for breakfast or just indulge yourself.  You will make it again, guaranteed! 

Ingredients: 

Oats 


1/2 cup - old fashioned oats 

1 cup - whole milk or 2%

pinch of salt 

1 teaspoon - brown sugar 

1 1/2 tablespoon - granulated sugar

Home Made Vanilla Bean Whipped Cream:

1/2 cup - heavy cream 

1 teaspoon - granulated sugar 

1/2 - vanilla bean, scraped (preferably Madagascar bean) 

berries to garnish 

almonds to garnish 


Directions:

Cook oats in milk and a pinch of salt according to the package directions or until tender. Mix in the brown sugar, pour in a serving bowl and press the oats with a spoon making a nice flat surface. Set aside to cool. 

In the mean while prepare the whipped cream. In a medium bowl add the heavy cream, sugar and the vanilla scrapings. Mix well. With a mixer, mix until the cream is thick and looks like a whipped cream. 


Back to the oats. Sprinkle the granulated sugar on top of the oats and shake the bowl distributing the sugar evenly. With a blow torch caramelize the sugar just like you would on a creme brûlée. The sugar will be wet so it will take you a little longer to blow torch it. Be careful as the longer you blow torch it, it could burn the oats. It doesn't have to be as golden brown as a creme brûlée. 


Top with berries of your choice. Add the whipped cream and sprinkle with almonds and ta daaa!!! Your creme brûlée oats is ready! 


Friday, May 15, 2015

Artichoke Hummus


I had a jar of marinated artichokes sitting in my cupboard for a really long time so I figured I need to use it.  And since I love hummus I thought I'd give it a try and mix artichoke hearts with chickpeas.  The result was this delicious hummus . I garnished it with green olives and pine nuts and I loved it.  In fact if you love green olives I recommend garnishing this yummy appetizer with more green olives than what this recipe calls for.  The beauty of this hummus is that you can make it in no time and it is super easy to make.  Serve and eat it with sweet peppers, pita, crackers, toast lettuce, carrots or any veggies you can think of. 


Ingredients:

1 can - chickpeas (garbanzo beans), drained  

1/3 cup - chopped parsley 

3 tablespoons -  extra virgin olive oil + for garnish 

1/2 cup - marinated artichoke hearts (about 5-6)

1/2 lime, juiced or more if you like

salt to taste

dash of black pepper 

green olives, chopped, for garnish 

pine nuts for garnish 

dash of paprika for garnish 


Directions:

In a food processor, add the chickpeas, parsley, olive oil, artichoke hearts, lime juice and black pepper.


Process until you get a nice puree consistency. Put the hummus in a serving bowl. With a spoon form a dent in the middle. Pour some olive oil in it and add the chopped green olives and pine nuts. Garnish with a dash of paprika. Enjoy! 


Wednesday, May 13, 2015

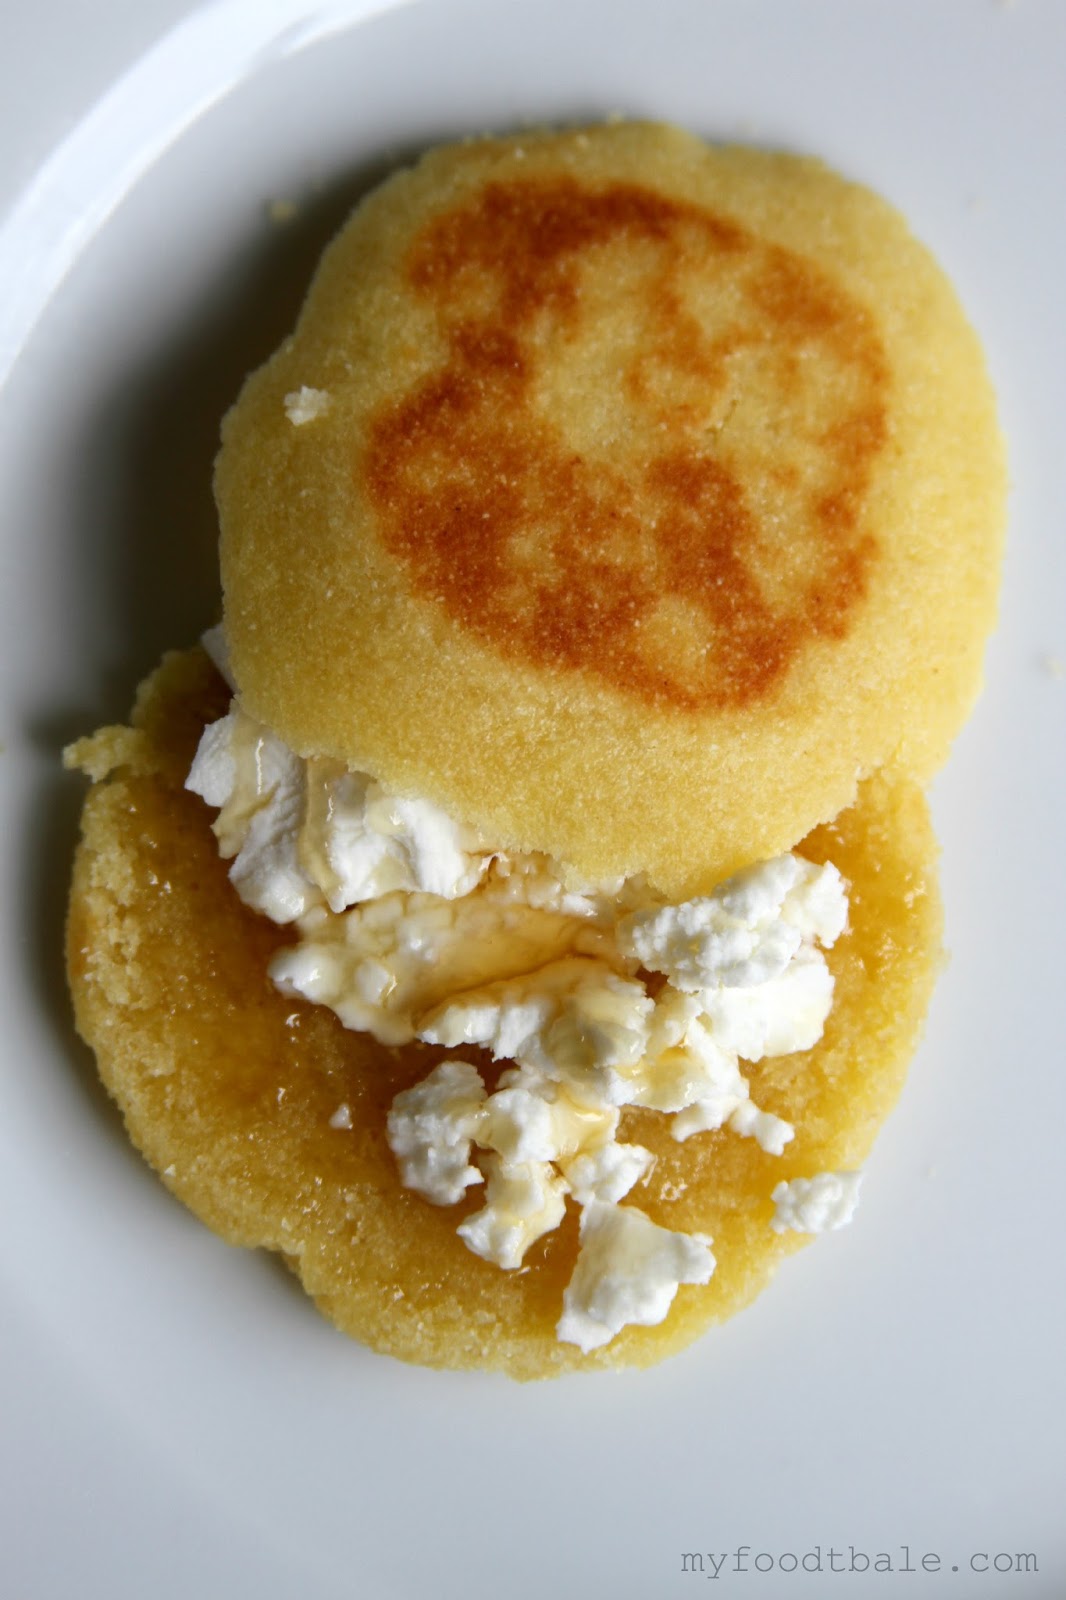
Harsha Moroccan Bread


If you love corn bread this Moroccan semolina bread is similar in texture and taste.  It is fast and easy to make yet so addicting.  Offer harsha at tea time, breakfast  or a snack.  Serve with cheeses, honey,  jams or even chocolate.  I personally like mine with a creamy cheese and honey at the same time.  So yummy.  Bon appetite!


Ingredients:

1 1/2 cups samolina flour 

2 tablespoons sugar 

1/4 teaspoon salt 

3/4 teaspoon baking powder 

7 tablespoons unsalted butter, room temperature  

1/2 cup 2% milk or more 

Directions: 

In a medium bowl mix all the dry ingredients (semolina, sugar, salt, baking powder).  Mix well.  Add the butter and use your hands to mix.  Add the milk little by little and until you form a smooth dough. If dough appears dry you may add more milk until you get the smooth results. Let dough rest for five minutes as the semolina will continue to absorb the milk. 

Heat up a non stick frying pan to medium heat.  In the mean time form dough into balls (you pick the size). Using the palm of your hands flatten the dough and form about 1/4"disks. You may use cookie cutters if you would like the Harcha to be the same size.  The thinner the disk is the crunchier it would be. If you are planning on slicing it in half I would suggest making the disks a little thicker.  You may work over and place the bread on parchment paper so it is easier. 


Reduce heat to low. (It is important that you do that so the bread won't cook only on the outside). Place a few of the disks on the pan.  Do not hurry to flip over, or they will crack.  Wait 5 minutes and when you notice that the bottom is golden brown then you may flip over. Repeat with the rest of the dough. 


Wait until bread is cooler to slit in half or else it will crack.  Make sure you use a sharp knife. Serve with creamy cheeses and honey. Or you may serve it with jam or chocolate if you'd like. 


Sunday, May 10, 2015

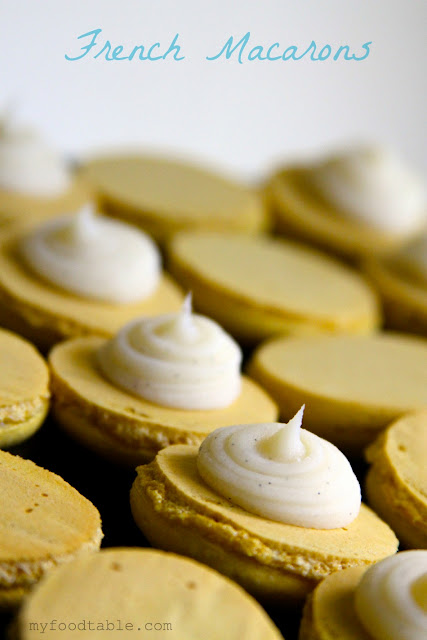
Vanilla Bean French Macarons


Vanilla flavor might seem a boring one but this recipe, my friends, will change your way of thinking.  A good vanilla flavor is often underestimated.  This flavor is probably one of my favorite flavors that I have made so far and that's not me because I am more of a chocolate kind of girl.  It is buttery, light and it has the perfect amount of sweet.  They say if you can make french macarons you can make pretty much anything.  I failed many times before I actually started making perfect batches with no cracks.  It is so exciting to make these, with so many flavors and so many ways to decorate them, it has been an addiction of mine.  Not to mention the sense of pride you feel after you have succeeded.  This post is so great because this is not only the recipe but also my detailed instructions of how to make these scrumptios macarons.  So here is everything I learned through my own failures and remember that macarons takes time, precision and most importantly passion. 


Macaron Shells: makes 56 small filled macarons (1.5 inches)


2 3/4 cups - almond flour (I prefer unblanched)

2 3/4 cups - powdered sugar 

1 cup egg whites (7-8 eggs) at room temperature 
(make sure there is ONLY egg whites and no yolk).

pinch of creme of tartar 

pinch of salt 

3/4 cup - superfine granulated sugar 

1/2 tsp - pure almond extract 

yellow or any color you like food coloring 


Laduree Vanilla Bean Filling:

1 madagascar vanilla bean 

2/3 cup + 3 Tbsp heavy cream (40%)

4 1/2 tsp corn starch flour (flour)

1/2 cup sugar 

3 1/2 oz white chocolate chips (vanilla chips ok)

7 1/2 tbsp unsalted butter, softened 

pinch of salt 

Instructions: 

In a large bowl, add the egg whites, cream of tartar and salt. Set aside and let it sit in a room temperature. 

Preheat oven to 325 and line your baking sheets (5-6) with parchment paper. (If you don't have that many baking sheets you can reuse the same ones. Just make sure sheets are cooled off before you pipe the macarons).  

Combine the flour with the powdered sugar and mix well. Sift together, discarding any large crumbs to make sure mixture is as fine as possible. Add more powdered sugar and flour to compansate for the discarded mixture. Sift one more time if needed. This keeps crumbs from forming on the macaron tops as they bake. (Do not make this in advance as mixture has to be fluffy.) 

With an ellectric mixer, beat the egg whites (which should have reached room temperature)at low speed. When the eggs become foamy, add the sugar slowly beating at the same time. Add the vanilla extract beating at the same time. Increase speed. When the meringue is starting to form, drop a few drops of food coloring. Beat until the egg whites form stiff peaks and your meringue is firm and shiny. (Merengue peaks should not droop but should be streight up).

Scoop two cups of the almond/sugar mixture and pour on the top of the egg mixture. Using a rubber spatula you will cut the batter as with a knife and flip the mixture without shaking the spatula. Just cut and flip while turning the bowl a few times (4-5). This will allow the eggs to stay fluffy while introducing the flour mixture to the merengue. Repeat the same with another 2 cups of flour. And then again with 1 1/2 cups of flour. You will know that the macaroon batter is ready when there is no more visible flour crumbs, mixture is glossy and flowing. (This is the hardest part to know when you are done. It is always better for the batter to be underdone than overdone). 

Fit your pastry bag with a number 806 round tip or equivalent. Pipe the batter into even circles. I like to pipe mine about 1 3/4 inch diameter but you can make them smaller or bigger if you wish. You can make a template to put under the parchment so that all the shells will be exactly the same size. Be sure to leave about one inch of space between macaroons so they will not touch each other while they bake. (If the peak that forms on the top of the macaron doesn't disappear after piping, it means the batter could have been beaten a little more. To eliminate the peaks, tap the baking sheet on the tabletop, making sure to hold the parchment paper with your thumbs. This also helps to get rid of the air bubbles). 

Let the piped macaroons rest for at least 20 minutes before baking.

Bake for 14 minutes. After the first 5 minutes of baking, open the oven door briefly to let the steam/moisture out. Don't forget to do this, it's very important to get the excess moisture out of the oven. Do not open the oven at any other time. Let macarons cool completely on the pan before taking them off the parchment paper. If the macarons seem too hard and you can see discoloration on top of the macaron, reduce baking time to 13 minutes. ( I have noticed with mine that the bigger macarons need 14 min and the smaller in size 13 minutes). 


Tips:

If you "age" the egg whites in the fridge for one day in advance, it will help a little of the moisture evaporate, giving you a better chance to success. 

If you live in a very humid area, add 2 teaspoons of powdered egg whites to your fresh egg whites to help stabilize. 


Vanilla Filling: 


The day before preparing the macarons, start the vanilla cream filling. Scrape the seeds from the vanilla bean into the 2/3 cup of cream, add the bean pod too and infuse overnight. (Infusing the cream overnight is recommended as it will give the cream more vanilla flavor.

The following day, in a seperate bowl, whisk the remaining cream into the corn starch flour until smooth. Remove the vanilla pod from the cream. Pour the infused cream into a sauce pan, stir in the sugar and salt and heat until simmering. Vigorously whisk the simmering liquid into the corn starch mixture until smooth. Return it to the sauce pan and whisk continuesly over low heat for 30 seconds until thickened and smooth then, pour into a bowl.

Use a spatula and little by little, gently stir the chocolate into the hot cream. Pour into a food processor when the temperature of the preparation cools to 113 degrees F (45 C). Gradually add the butter and process until the filling is smooth and creamy. Pour into a gratin dish and cover with plastic wrap placing it directly on the vanilla cream; refrigerate for 2 hours or until it is firm enough to be piped. (It usually takes me more than 2 hours for the cream to be firm so make sure it is completely ready before you pipe it onto the macaroons). You will LOVE this filling!


Friday, May 8, 2015

Strawberry Mint French Macarons


This would not be my blog if I didn't post anything about french macarons.  They say if you can make french macarons you can make pretty much anything.  I failed many times before I actually started making perfect batches with no cracks.  But oh boy...was it worth it!!!  It is so exciting to make these, with so many flavors and so many ways to decorate them, it has been an addiction of mine.  I am writing not only the recipe but also detailed instructions of how to make these scrumptious macarons .  Strawberry mint is not a popular combination of ingredients, but after making the strawberry mint filling I seriously thought I was in heaven.  So good! (Forgive me if I am going a little overboard here, but these really are SO good).  If you love strawberries, you will be in love.  So here is everything I learned through my own failures and remember that this recipe takes time, precision and most importantly passion. 


Macaron Shells: makes 56 small filled macarons (1.5 inches)


2 3/4 cups - almond flour (I prefer unblanched)

2 3/4 cups - powdered sugar 

1 cup egg whites (7-8 eggs) at room temperature 
(make sure there is ONLY egg whites and no yolk).

pinch of creme of tartar 

pinch of salt 

3/4 cup - superfine granulated sugar 

1/2 tsp - pure vanilla extract 

red food coloring 


Strawberry Mint Filling:  recipe adapted by Laduree  

1 cup + 2 tbsp - superfine granulated sugar 

2 tsp - pectin powder 

13 oz strawberries 

Juice of 1/2 lemon, strained 

15 fresh mint leaves, finely sliced 


Instructions: 

In a large bowl, add the egg whites, cream of tartar and salt. Set aside and let it sit in a room temperature. 

Preheat oven to 325 and line your baking sheets (5-6) with parchment paper. (If you don't have that many baking sheets you can reuse the same ones. Just make sure sheets are cooled off before you pipe the macarons).  

Combine the flour with the powdered sugar and mix well. Sift together, discarding any large crumbs to make sure mixture is as fine as possible. Add more powdered sugar and flour to compansate for the discarded mixture. Sift one more time if needed. This keeps crumbs from forming on the macaron tops as they bake. (Do not make this in advance as mixture has to be fluffy.) 

With an ellectric mixer, beat the egg whites (which should have reached room temperature)at low speed. When the eggs become foamy, add the sugar slowly beating at the same time. Add the vanilla extract beating at the same time. Increase speed. When the meringue is starting to form, drop a few drops of red coloring. Beat until the egg whites form stiff peaks and your meringue is firm and shiny. (Merengue peaks should not droop but should be streight up).

Scoop two cups of the almond/sugar mixture and pour on the top of the egg mixture. Using a rubber spatula you will cut the batter as with a knife and flip the mixture without shaking the spatula. Just cut and flip while turning the bowl a few times (4-5). This will allow the eggs to stay fluffy while introducing the flower mixture to the merengue. Repeat the same with another 2 cups of flower. And then again with 1 1/2 cups of flower. You will know that the macaroon batter is ready when there is no more visible flower crumbs, mixture is glossy and flowing. (This is the hardest part to know when you are done. It is always better for the batter to be underdone than overdone). 


Fit your pastry bag with a number 806 round tip or equivalent. Pipe the batter into even circles. I like to pipe mine about 1 3/4 inch diameter but you can make them smaller or bigger if you wish. You can make a template to put under the parchment so that all the shells will be exactly the same size. Be sure to leave about one inch of space between macaroons so they will not touch each other while they bake. (If the peak that forms on the top of the macaron doesn't disappear after piping, it means the batter could have been beaten a little more. To eliminate the peaks, tap the baking sheet on the tabletop, making sure to hold the parchment paper with your thumbs. This also helps to get rid of the air bubbles). 

Let the piped macaroons rest for at least 20 minutes before baking.


Bake for 14 minutes. After the first 5 minutes of baking, open the oven door briefly to let the steam/moisture out. Don't forget to do this, it's very important to get the excess moisture out of the oven. Do not open the oven at any other time. Let macarons cool completely on the pan before taking them off the parchment paper. If the macarons seem too hard and you can see discoloration on top of the macaron, reduce baking time to 13 minutes. ( I have noticed with mine that the bigger macarons need 14 min and the smaller in size 13 minutes). 

Tips:

If you "age" the egg whites in the fridge for one day in advance, it will help a little of the moisture evaporate, giving you a better chance to success. 

If you live in a very humid area, add 2 teaspoons of powdered egg whites to your fresh egg whites to help stabilize.


Strawberry Mint Filling Directions:

Combine the sugar and the pectin powder in a bowl.

Put the strawberries into a bowl and reduce to a pulp using a stick blender. Put the strawberry pulp in a sauce pan and warm. Stir in the sugar - pectin mixture then, the lemon juice. Bring to the boil over medium heat; Bring to the boil over medium heat; cook for 2 minutes.

Pour the filling into a bowl and cover with plastic wrap. Set aside until cold then, refrigerate. Gently stir the mint leaves when the filling is very cold. Pipe onto macarons. It is recommended that the macarons should be refrigerated over night before serving. Enjoy!


Saturday, May 2, 2015

Japanese Lettuce Wraps

Summer is almost here and I tend to crave less carbs.  These lettuce wraps are not only delicious but so easy and there is no guilt when you wish for seconds. What I love about these is the combination of the juicy chicken rich in flavour and crunchy water chestnuts and lettuce.  Ideal for summer lunch or dinner!   

Ingredients: 

1 Tbsp olive oil 

1 lb skinless boneless chicken, chopped as small as the size of a pea or ground it

2 cloves garlic, minced 

1/4 cup hoisin sauce 

2 Tbsp soy sauce 

1 Tbsp rice wine vinegar 

1 Tbsp freshly grated ginger (optional) 

1 tsp Sriracha (hot sauce) or more to taste 

1 (8oz) can whole water chestnuts, drained and diced 

Kosher salt and freshly ground black pepper to taste 

1 head butter or Romain lettuce 

sesame seeds for garnish 

green onions for garnish

Directions:

Heat olive oil in a saucepan over medium high heat. Add chicken and cook until chicken is no more pink, about 3-5 minutes. Make sure to crumble chicken as it cooks. Drain excess fat. 

Stir in garlic, onion, hoisin sauce, soy sauce, rice wine vinegar, ginger and Sriracha until onions have become translucent, about 1-2 minutes. Stir in chestnuts until tender, about 1-2 minutes; season with salt and pepper to taste. 

To serve, spoon several tablespoons of the chicken mixture into the center of a lettuce leaf. Garnish with green onions and sesame seeds and serve. 


Friday, May 1, 2015

Virgin Mint Julep

Whether it is derby time or not,  I am a sucker for virgin mint juleps.  Fresh and delicious, this julep is great for BBQ's or any outdoor party.  I took a Southern recipe and changed a few of the main ingredients to make it even better.  I hope you make extra, because this is going to go fast.  Enjoy!

Ingredients: 

5 mint springs

1 1/3 cups sugar 

2 cups cold water

3/4 cup lime juice (5 limes juiced)

1/4 cup 100% orange juice

1 1/2 ginger ale 

lime slices for garnish 

ice 

Directions:

Rince the mint and discard stems. Place sugar, water, lime juice, orange juice and mint in a medium bowl. Mix well and allow to stand for 30 minutes. 


Fill a lage pitcher with ice cubes. Mix the mint mixture one more time as the sugar would have sank to the bottom of the bowl. Strain the liquid over the ice. Squeeze the mint leaves over the ice as well, then discard. Add the ginger ale and the lime slices to garnish. If you are doing individual glasses you may also garnish with mint.